Unreal使用Python#
参考文章
1. Unreal使用Python#
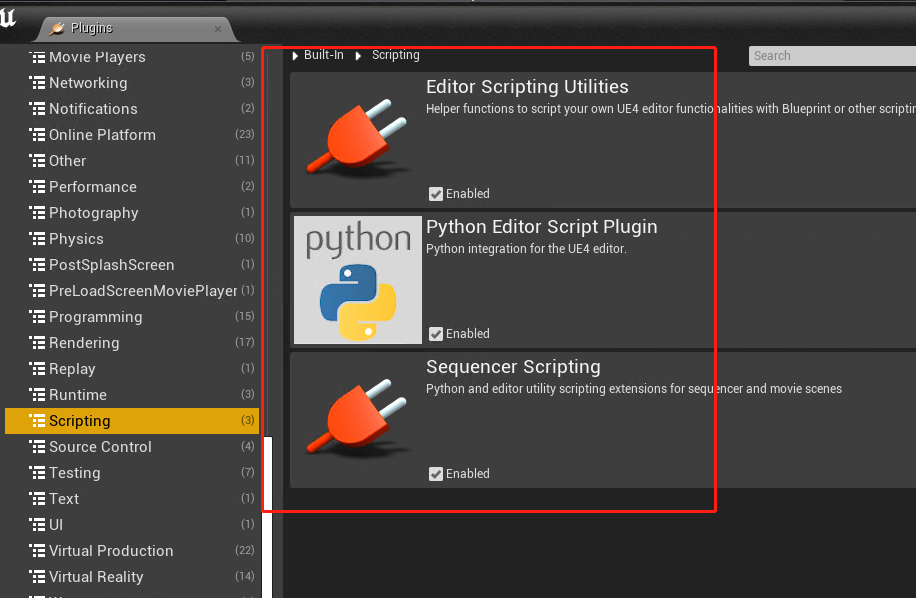
1.1 开启python插件#
在插件控制器,开启python相关插件,重启即可
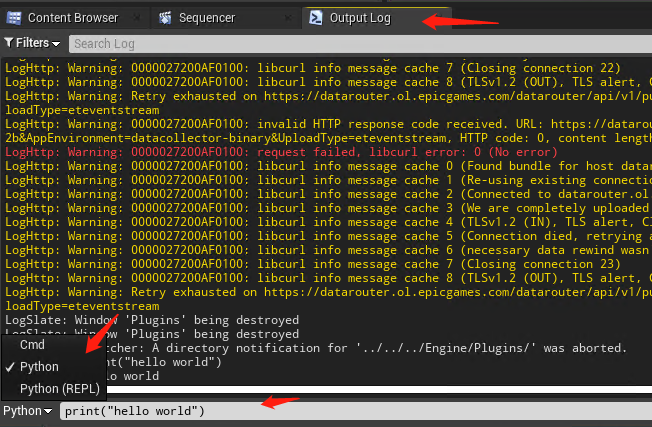
在outputLog的python窗口可以输入python的代码,或者cmd窗口执行py文件
1.2 使用init_unreal.py 文件#
init_unreal.py 文件的使用类似于Maya的userSetup.py文件,把init_unreal.py 文件放在指定的路径下,然后Unreal编辑器启动的时,就会自动执行该py文件
Unreal的init_unreal.py文件默认python路径
项目文件夹下的 Content/Python 子文件夹。
主虚幻引擎安装文件夹中的 Content/Python 子文件夹。
每个启用的插件的文件夹下的 Content/Python 子文件夹。
用户目录中的 Documents/UnrealEngine/Python 文件夹。例如,在Windows 10中,该路径是
C:/Users/Username/Documents/UnrealEngine/Python在系统环境变量中PYTHONPATH指定的路径
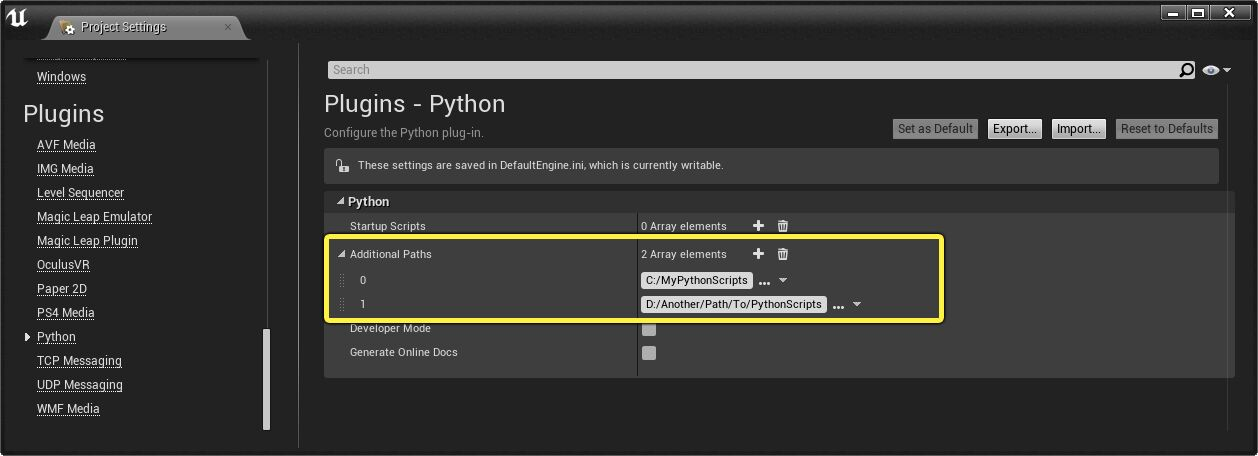
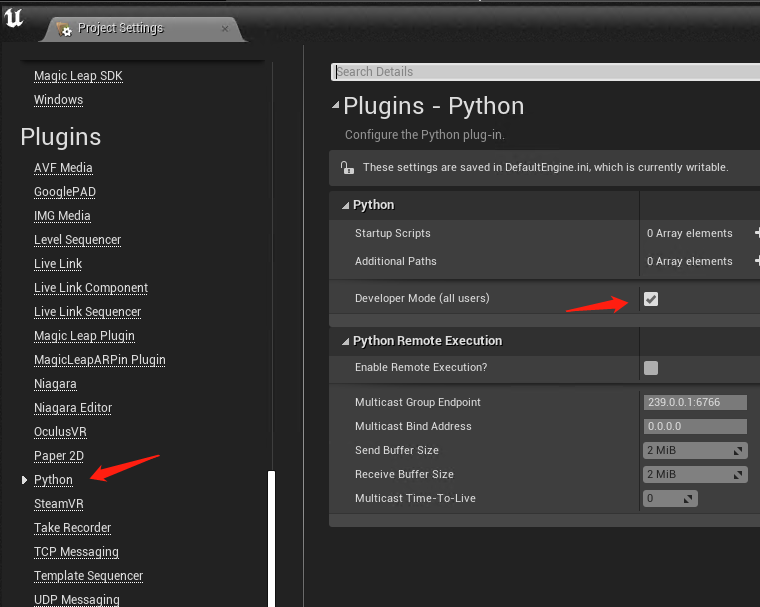
在Unreal添加python路径
1.3 配置vscode#
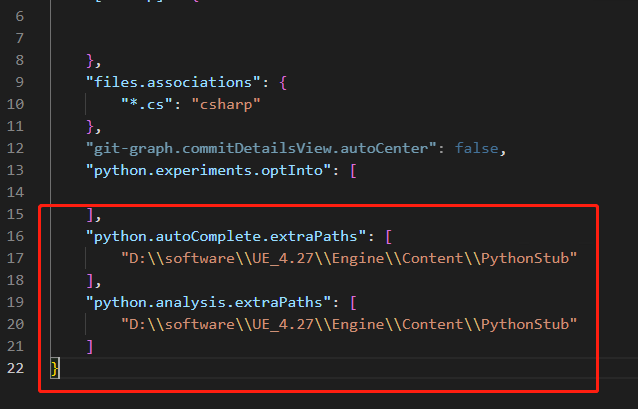
生成py开发配置的unreal.py文件,把PythonStub拷贝到UE安装目录下的Content/PythonStub

在VSCode的python的setting文件设置相关路径,重启vsc即可使用智能提示

1.4 查找Unreal函数技巧#
重点:在Unreal中能使用Python的函数都是蓝图命令; 在任意蓝图节点的事件图表可以查看到
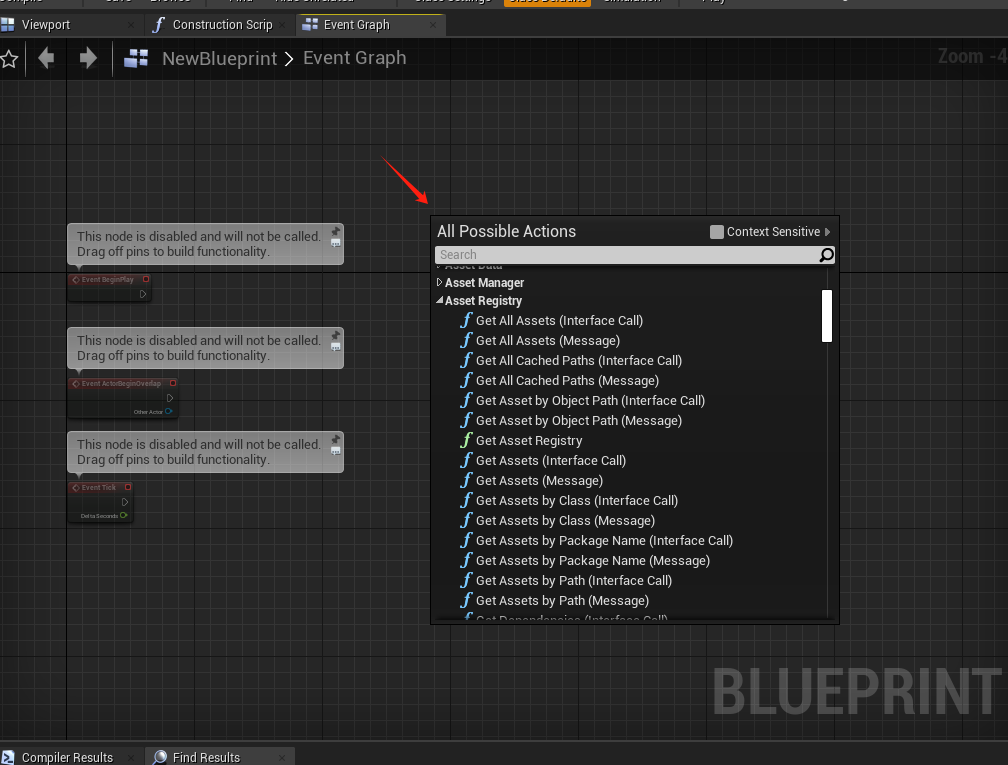
同样的可以在Unreal的 C+中扩展Python的函数(实质上就是编写蓝图节点)
示例:
// TestScriptLibrary.h
// Copyright Epic Games, Inc. All Rights Reserved.

#pragma once

#include "Kismet/BlueprintFunctionLibrary.h"
#include "TestScriptingLibrary.generated.h"


UCLASS()
class UTestScriptingLibrary : public UBlueprintFunctionLibrary
{
        GENERATED_UCLASS_BODY()

        // 使用UFUNCTION指定函数,并使用BlueprintCallable标记函数是蓝图的节点
        UFUNCTION(BlueprintCallable, Category = "TestScriptingLibrary")
        static TArray<FString> GetSelectedPathViewFolders();

        UFUNCTION(BlueprintCallable, Category = "TestScriptingLibrary")
        static TArray<UObject*> GetReferencedAssetsForSelectedActor(const bool bIgnoreOtherAssetsIfBPReferenced);

        UFUNCTION(BlueprintCallable, Category = "TestScriptingLibrary")
        static void SetSelectedPaths(const TArray<FString>& FolderPaths, bool bNeedsRefresh = false);

        UFUNCTION(BlueprintCallable, Category = "TestScriptingLibrary")
        static int32 GetNumberUVChannels(UStaticMesh* StaticMesh, int32 LODIndex);

        UFUNCTION(BlueprintPure, Category = "TestScriptingLibrary")
        static int32 GetNumBones(USkeletalMesh* SkeletalMesh);

        UFUNCTION(BlueprintCallable, Category = "TestScriptingLibrary")
        static TArray<FString> GetAllProperties(UClass* Class);

        UFUNCTION(BlueprintCallable, Category = "TestScriptingLibrary")
        static UPackage* GetPackage(const FAssetData& AssetData);

        UFUNCTION(BlueprintCallable, Category = "TestScriptingLibrary")
        static void PrintAssetData(const FAssetData& AssetData);

        UFUNCTION(BlueprintCallable, Category = "TestScriptingLibrary")
        static void CollectUnreferenceAsset();

};
2. Unreal使用PySide2#
PySide2安装到Unreal的Python下,可以直接用Python的Pip安装,或者使用sys.path.append把PySide2的库添加到Unreal的python路径

在cmd执行以下py文件即可
import sys

# sys.path.append(".../pyside2_libs") # 添加PySide2的库到Unreal的Python路径
#

from PySide2 import QtGui
from PySide2 import QtWidgets

import unreal

class TestWidget(QtWidgets.QWidget):
        def __init__(self, parent=None):
                super(TestWidget, self).__init__(parent)

                vbox = QtWidgets.QVBoxLayout(self)
                btn = QtWidgets.QPushButton('Test')
                btn.clicked.connect(self.btn_clicked)
                vbox.addWidget(btn)

        def btn_clicked(self):
                print('Clicked')
                unreal.log('Clicked')


app = None
if not QtWidgets.QApplication.instance():
        app = QtWidgets.QApplication(sys.argv)

widget = TestWidget()
widget.show()

# 把PySide的窗口指针绑到Unreal的窗口
unreal.parent_external_window_to_slate(widget.winId())